After mixed results with the earlier synchronization client, the arrival of a new one is welcome news.
For more information and to download the client, go to this link – Meet the OneDrive for Business Next Generation Sync Client and refer to the deployment package for specifics on installation before proceeding. Click here for deployment package from Microsoft: Microsoft OneDrive For Business Deployment Package.
Specifically, if you have no accounts already signed into OneDrive, you need to enable the ability to log into one drive with an Office 365 account (Work or School account).
If you have no accounts signed in to OneDrive:
1.In the Deployment Package, open DefaultToBusinessFRE.reg and then open EnableAddAccounts.reg.
2.Select the Start button, search for “OneDrive”, and then open it:
In Windows 10, select the OneDrive desktop app.
In Windows 7, under Programs, select Microsoft OneDrive.
3.When the Welcome to OneDrive wizard starts, select Sign in to set up your work or school account.
If you already have a personal account signed in to OneDrive:
If you already have a personal account signed in to OneDrive, you’ll want to use OneDrive Settings so that you can add a work or school account. You can enable this setting by setting the following regkey:
1.Exit the OneDrive sync client by right-clicking the white OneDrive cloud icon in the taskbar notification area, and selecting Exit.
2.In the Deployment Package, open EnableAddAccounts.reg.
3.Relaunch the OneDrive sync client: Select the Start button, search for “OneDrive”, and then open it:
In Windows 10, select the OneDrive desktop app.
In Windows 7, under Programs, select Microsoft OneDrive.
4.In the taskbar navigation area, right-click the white OneDrive cloud icon and select Settings.
(You might need to click the Show hidden icons arrow next to the notification area to see the OneDrive icon.)
5.In Settings, select Account, and then select Add a business account.
When the Welcome to OneDrive wizard starts, select Sign in to set up your work or school account.
6.Sign in with your work or school account.
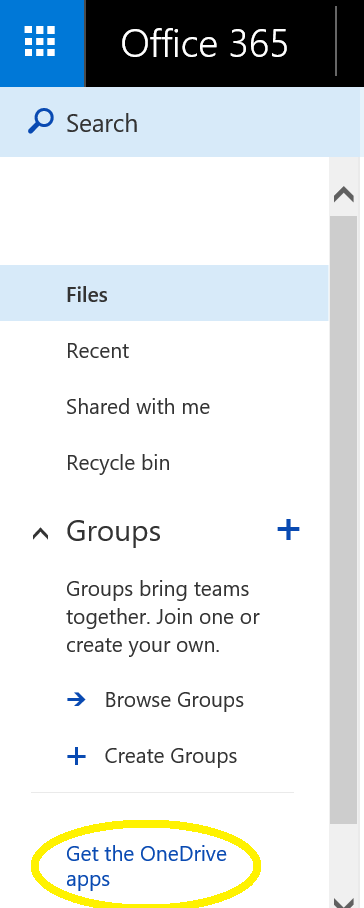
To download, click on “download the OneDrive for Business Next Generation Sync Client”, or go to your office 365 portal such as your Web based email or SharePoint site and follow the steps below.
Click on the 9 squares just below the browser’s address bar.
Click on One Drive.
Then on the left towards the bottom, click on “get the One Drive Apps.”
If you have Windows 10 Enterprise, configuring the computer user with the Azure/AD setting, using the user’s Office 365 email address as the computer user, may save time from continuously providing security credentials to One Drive and other Office 365 resources.
An error we have seen in deploying the One Drive for Business synchronization client, especially if you are using Office 2016, is “‘The server you are trying to access is using an authentication protocol not supported by this version of Office.” The fix from community.office365.com below worked. It has a few steps, but following it has resolved the issue.
From community.office365.com, thanks to pstoric.
1.Accessed Control Panel > Selected the Microsoft Office Subscription > right clicked > change > Selected Online Repair
2.Removed all the stored credentials in the credentials manager (control panel > credentials manager)
3. Restarted the computer
4. Deleted the folder’s below:
C:\Users\username\AppData\Local\Microsoft\Office\Spw
C:\Users\username\AppData\Local\Microsoft\Office\16.0\OfficeFileCache
5. Sign in Word (opened blank document > file > account > signed out and signed in office 365 account)
6. Started OneDrive for Business. ( from the search bar typed OneDrive for Business> clicked on the app > sync a different library instead >pasted the url of the team site “Public documents” > sync now).
A Law Office Clouds consultant to fix this issue or any other is just a phone call/remote support session away. For support on all Office 365 needs, ask for an Office 365 specialist. Call 800.928.8781.


